The difference between Damascus and Canister Damascus
Damascus is a combination of metals of different carbon contents. The difference between Damascus and Canister Damascus is the process to create the Damascus metal. Damascus metal was used to make sword blades in the Middle Eastern region starting around the 3rd century. The metals were forge welded together, folded over on itself and forge welded again, this was done several times. Canister Damascus or Canned Damascus is also a metal that is mixed but the process is different. Instead of repeatedly forge welding, Canned Damascus is made by melting metal powder along with other metals of different carbon contents in a canister made from square tube stock.
Carbon Content; Hardness and Flexibility
Metal with higher a carbon content is harder and can hold an edge, but it is also more brittle. Metal with lower the carbon content is softer and more flexible but does not hold an edge for very long. To get advantages from both end of the spectrum, metals with different carbon contents were combined together. This produced metal that was flexible enough that it was resistant to shattering and was also hard enough to hold a sharp edge for an extended period of use. Not only does the metal perform better, but it also has a very decorative pattern.
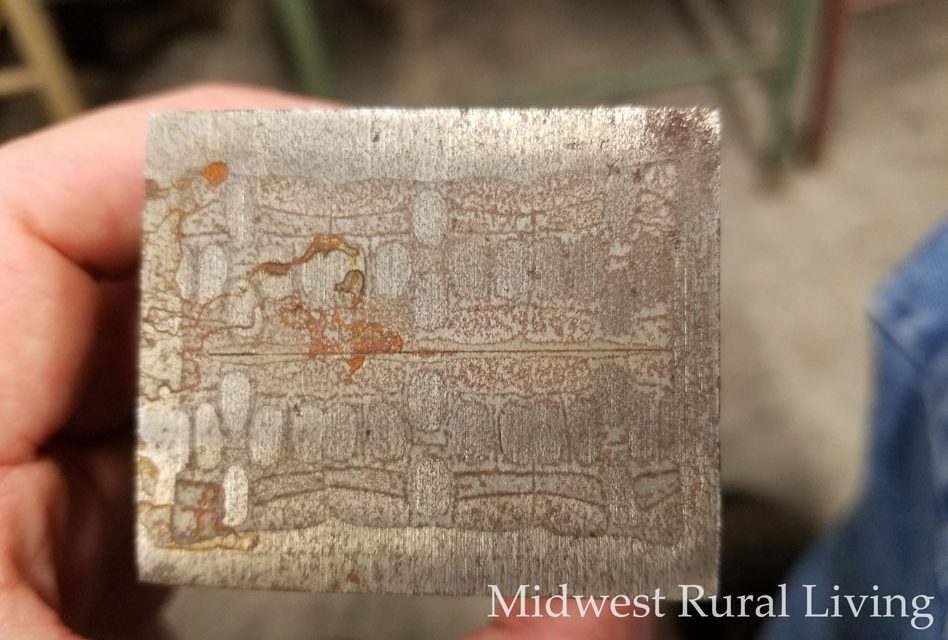
Pattern Steel

Dad and I attended a blacksmith demonstration held by The Illinois Valley Blacksmith Association on the historical grounds in Carlinville, IL. The feature demonstration was on how to make Canister Damascus. The demonstrator pointed out that real Damascus is only made in the region of the same name and anything made with the same method outside of that region was actually called Pattern Steel. Since Damascus is more of a familiar term that is more widely recognized I will continue to use it throughout this post. The demonstrator brought a Damascus knife he had made previously. The rough finish of the blade replicates the look of a flint knife.
How to make Canister Damascus
The Metal Powder
The demonstrator worked as a machinist so he collected metal powder from cutting metal on bandsaws or from grinding metal on a bench grinder. Since he would work with one type of metal at a time he was able to collect the metal powder and keep it separate from other different types of metal. He stored the metal powders in their own individual containers and made sure to label them according to there carbon content. Since he always knew what metal he was working with he had more control of how the finished project looked. If you do not have access to powder metal you can also order it online in different carbon contents. There are various suppliers but I was able to find several buying options on EBay.
Filling the Canister for the Canister Damascus
The first step in making Canister Damascus is to make the canister. He started with a 4 inch long piece of 2 inch square tube. He cut 3 sides of the square tube off at 2 inches. The overhang of the 4 inch side was bent over to cover the opening of the tube and then it was welded to make the solid bottom of the canister. At this point he had a square cup to hold all of the powder. He had some 2 inch pieces of hacksaw blades that he was going to use in this billet. He stacked a several blades together and place the stack in the pattern he wanted, then he poured metal powder around it to lock the blades in place. The sides will need to be tapped with a hammer during the process so all the empty cavities will be filled.
He also did some other Canister Damascus billets that instead of just a pattern it had a letter or initial in them. He made the canisters in the same manner. Then he used a letter shape metal cookie cutter, that was small enough to fit inside the canister, as a mold. He placed the cookie cutter flat on the bottom of the canister and using a spoon he carefully surrounded the outside of the cookie cutter with metal powder. He left enough of the top of the cookie cutter exposed to grab onto with a pair of tweezers. Once it was close to the top he then filled the inside of the cookie cutter with 2% or 4% nickel powder, which I also found the nickel powder is available on EBay. He filled the nickel powder level with the metal powder. Using a pair of tweezers he was able to grab the top edge of the cookie cutter that was left exposed and pulled straight up so both powders were disturbed as little as possible.
The filling of the canisters was the most tedious part of the process. After the canisters were filled level to the top then a cap was welded over the top. It was welded almost all the way around but a small hole was left in the corner for gases to escape while it is being heated up. To make it easier to handle while hammering on it, a piece of round stock was welded to the bottom of the canister. He did not mention it, but when he laid the canister on its side to weld the rod on, I image he made sure to keep the relief hole for the gases to escape was on top so the powder would not run out of the hole when it was on its side.
The Gas Forge

He used a gas forge that he made himself from an old propane tank and on the forge he had angle steel welded to it that held fire bricks upright on their edge to block off the ends of the forge. The bricks were able to slide inside the edge of the angle steel so he could slide them over either end of the forge to completely open, completely close, or any position between. I really liked this design because it was really simple, it keeps everything self contained, and it is adjustable for small pieces or for larges pieces that will need to hang out of the back of the forge.
He also pointed out the gas nozzle was not made to point to the center of the forge like a lot of manufactured gas forges but he placed it at an angle. He said if it was pointed to the center then the flame would hit the other side of the forge with such force that it would blow flames out of the ends of the forge. This was a big waste of heat energy. With the nozzle pointed at an angle the flame would follow the curve of the inside of the forge and the flames would travel in a circular motion inside the forge. Thus more heat would be transferred to your work and not wasted.
Heating and Hammering, aka The Fun Stuff
He placed the canisters in the gas forge with the welded rod stock handle sticking of the front of the forge. As the canisters heat up and the powder starts to melt you may hear the gases escape and might see a flame coming out of the relief hole. Wait until after the gases and flames stop coming out of the relief hole. He was talking the whole time so he ended up leaving the pieces in for awhile so the exact amount of time you will need to adjust with experience.
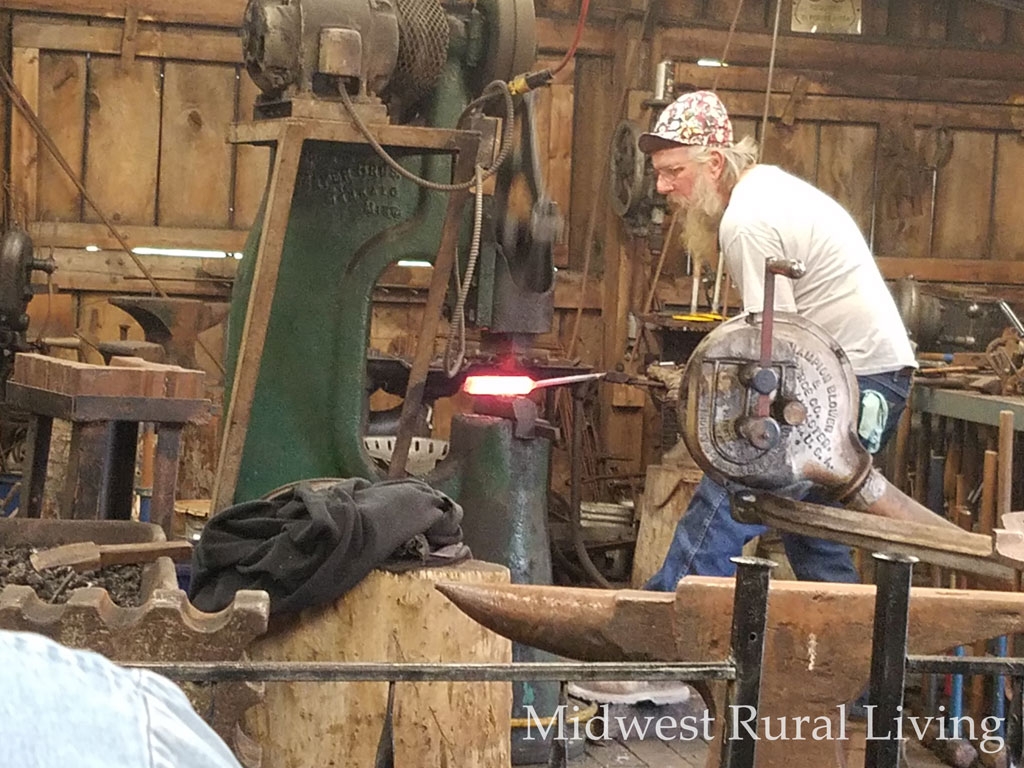
After he determined it had been in the forge long enough he removed one of the canisters by the rod handle and took it to the power hammer. He worked it on both sides into a flat bar. The metal of the canister was now worked pretty thin so after it cooled he would take an angle grinder and ground the metal of canister until all that was left was the Damascus metal. It was getting late so we were not able to see the final product or how the letter billets turned out.
Alternative Tips for Canister Damascus
The finished Canister Damascus looked very cool, but personally the prospect grinding for long amounts of time is what causes me not to want to start projects like this. Anytime I can cut down on grinding it is welcomed. I did some research and other blacksmiths had some time saving tips on Canister Damascus or Canned Damascus depending on how they refer to it as.
Canister Damascus always starts with the canister. You still use a length of square tube for the canister but cut it to length completely through instead of just off three sides as in this example. Also make sure the inside is clean using a wire brush. The end caps should be flat squares that fit inside the ends of the tube and not flush over the ends.
The major time saver is using liquid white out. Once the bottom is welded on coat all the inside of the canister and the inside of the top cap with the liquid white out. It should take between 30 min to and hour to dry depending on the humidity. If it cracks then touch up those spots until the crack is covered. The zinc oxide in the white out keeps the canister from being welded to the Damascus.
Fill the canister up and weld the cap on leaving a relief hole. Heat up in the forge and hammer on all sides to flatten out some and let it cool. Once it is cool you can sometimes shake the canister and hear the Damascus billet rattling inside. Clamp in a vise and use an angle grinder to cut down the length of the canister. Then use a chisel and hammer to peel back the canister enough to get the billet out.
Leave a Comment
I hope this was useful to you. Please leave a comment or email me from the contact page if this was helpful to you or if you have any more tips on making Canister Damascus. I really do appreciate you taking the time to read this and hope you will come back again.
Interesting article – thanks. I would caution on using brake cleaner though – there’s the potential for it to convert to phosgene gas at high temperatures. http://www.brewracingframes.com/safety-alert-brake-cleaner–phosgene-gas.html
Thank you for the information. I honestly didn’t know and do no want anyone to get hurt so I will edit the article. I really appreciate you reaching out.
I am not currently a blacksmith, but being a huge “Forged in Fire” fan and having a strong desire to try blacksmithing, there is something I’ve always wondered about making canister damascus. Has anyone every used anything besides a steel canister to make the billet? What I had always thought was that one could use a CERAMIC container, allowing the steel inside to get hot enough to forge weld together, and then when cool, simply smash the container to reveal the billet inside. Once again, as a newbie, this may be the dumbest idea any experienced smith has ever heard, so, I get that it may be. But just curious if it’s ever been considered or tried.
My partner works with steel and says ceramic should work as well as copper. I suppose you should just try it and also see what is cheaper in the long run
Why do you need to remove the canister? Can the canister not be worked into the knife?
The canister doesn’t have the pattern it is made of one type of steel. Most of the time you want to see the pattern, it’s pretty.
I don’t mean to be rude, but I’d like to point out that you’ve mixed up Damascus steel and pattern welded steel. The appearance of Damascus steel does not come from folding and forge welding and it does not involve in any combination of different materials during the forging process. Pattern welded steel appears to be similar to Damascus steel, however the appearance of modern “Damascus” steel results from the visible folds in the material that create an elaborate pattern. The material that was used to make historic Damascus blades had its unique watery patterns before it was ever forged into a blade, it is a result of the production process during the manufacturing of the metal itself. It’s appearance comes micro carbides within a matrix of iron allotropes such as pearlite, cementite, and martensite that have crystallized within high carbon steel. The carbides appear darker than the steel, which results in the visible pattern. Anyway, I still enjoyed the article and had not heard of canister welding before, very cool!